
 Island In The Sky
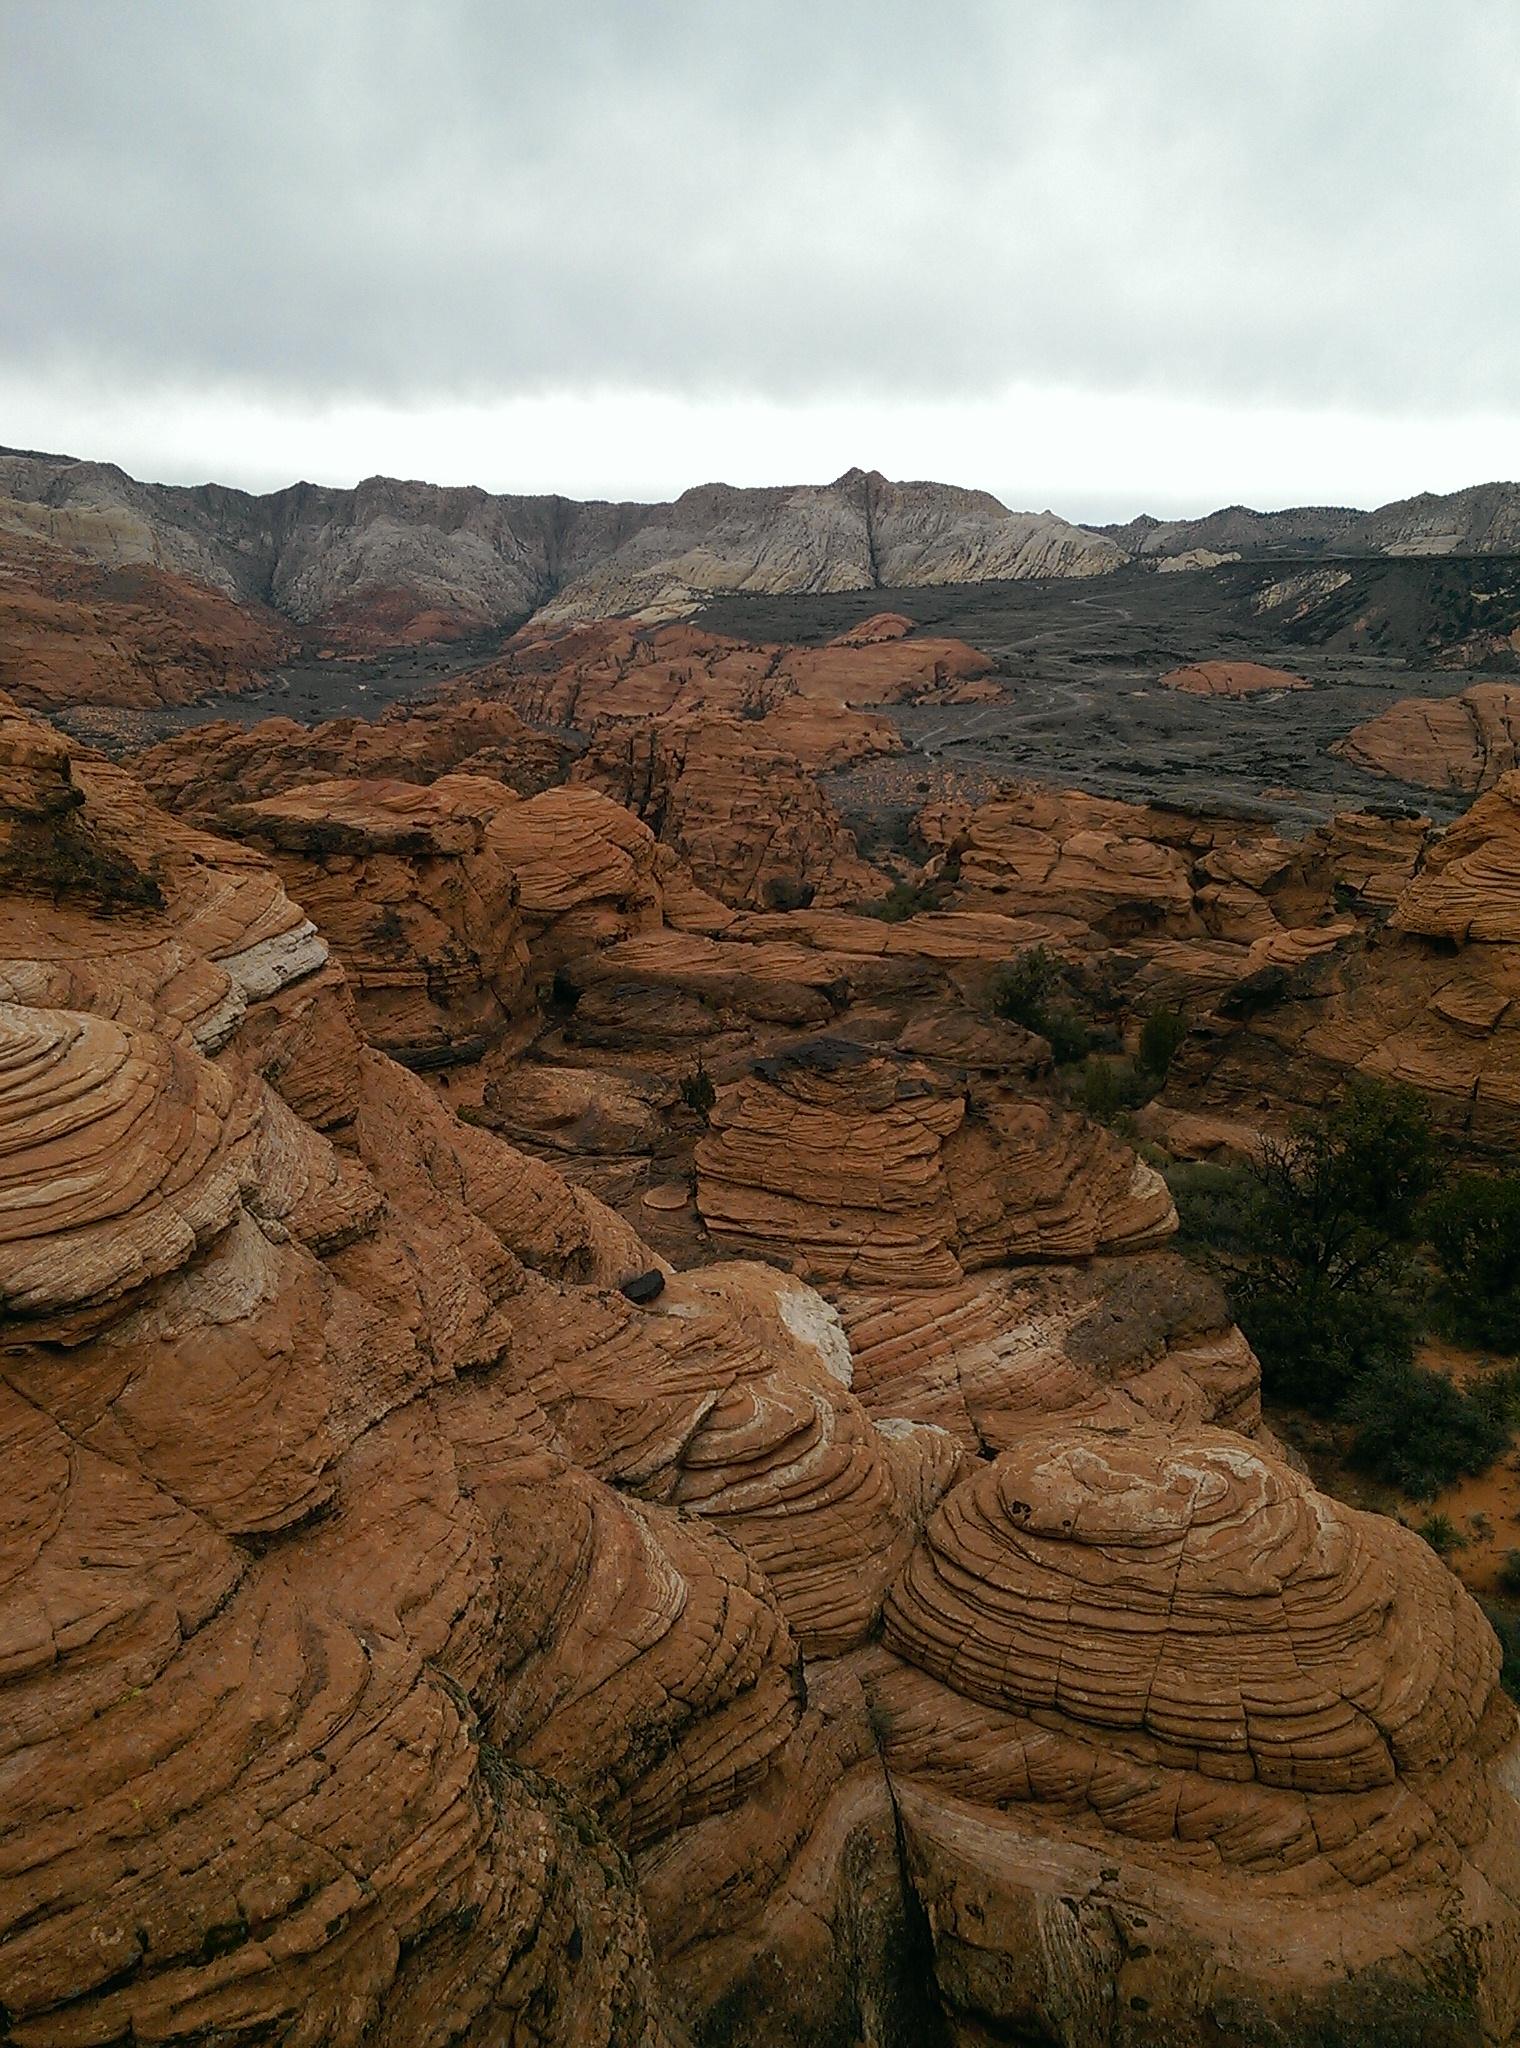
Snow Canyon
Overview
Island In The Sky is an intricate route for seasoned climbers and canyoneers with some climbing experience. This is a route that had eluded me a few times due to lack of permit availability, but when I finally visited in 2016, it did not disappoint!
The route contains many sections of exposed easy 5th class climbing, with a short crux or two maybe as difficult as 5.6. Belaying the entire route would be painfully slow; everyone in your group should have a fair amount of confidence climbing lower 5th class without a rope. In addition to the fun climbing, the route offers route finding challenges that can delight, confuse, and downright frustrate even the most seasoned desert rat at times. I found the route finding about as challenging and fun as spending a day in the Fiery Furnace in Arches. If you are up for the challenge, Island In The Sky makes for a very memorable and rewarding day out and is highly recommended.
Getting There
From the south entrance of the park on Snow Canyon Road, reset your odometer as you enter the park. At 1.4 miles there is a wide spot next to the road before the road crosses a small wash. This is at the northern point of the Island in The Sky. Park here and locate a social trail that heads to the base.
Note: At 0.7 miles from the south entrance station is a pullout on the left at the large sand dunes. If you have two cars, you can leave one here, this is the exit trailhead.
Route Description
Part 1 - To the Shoulder
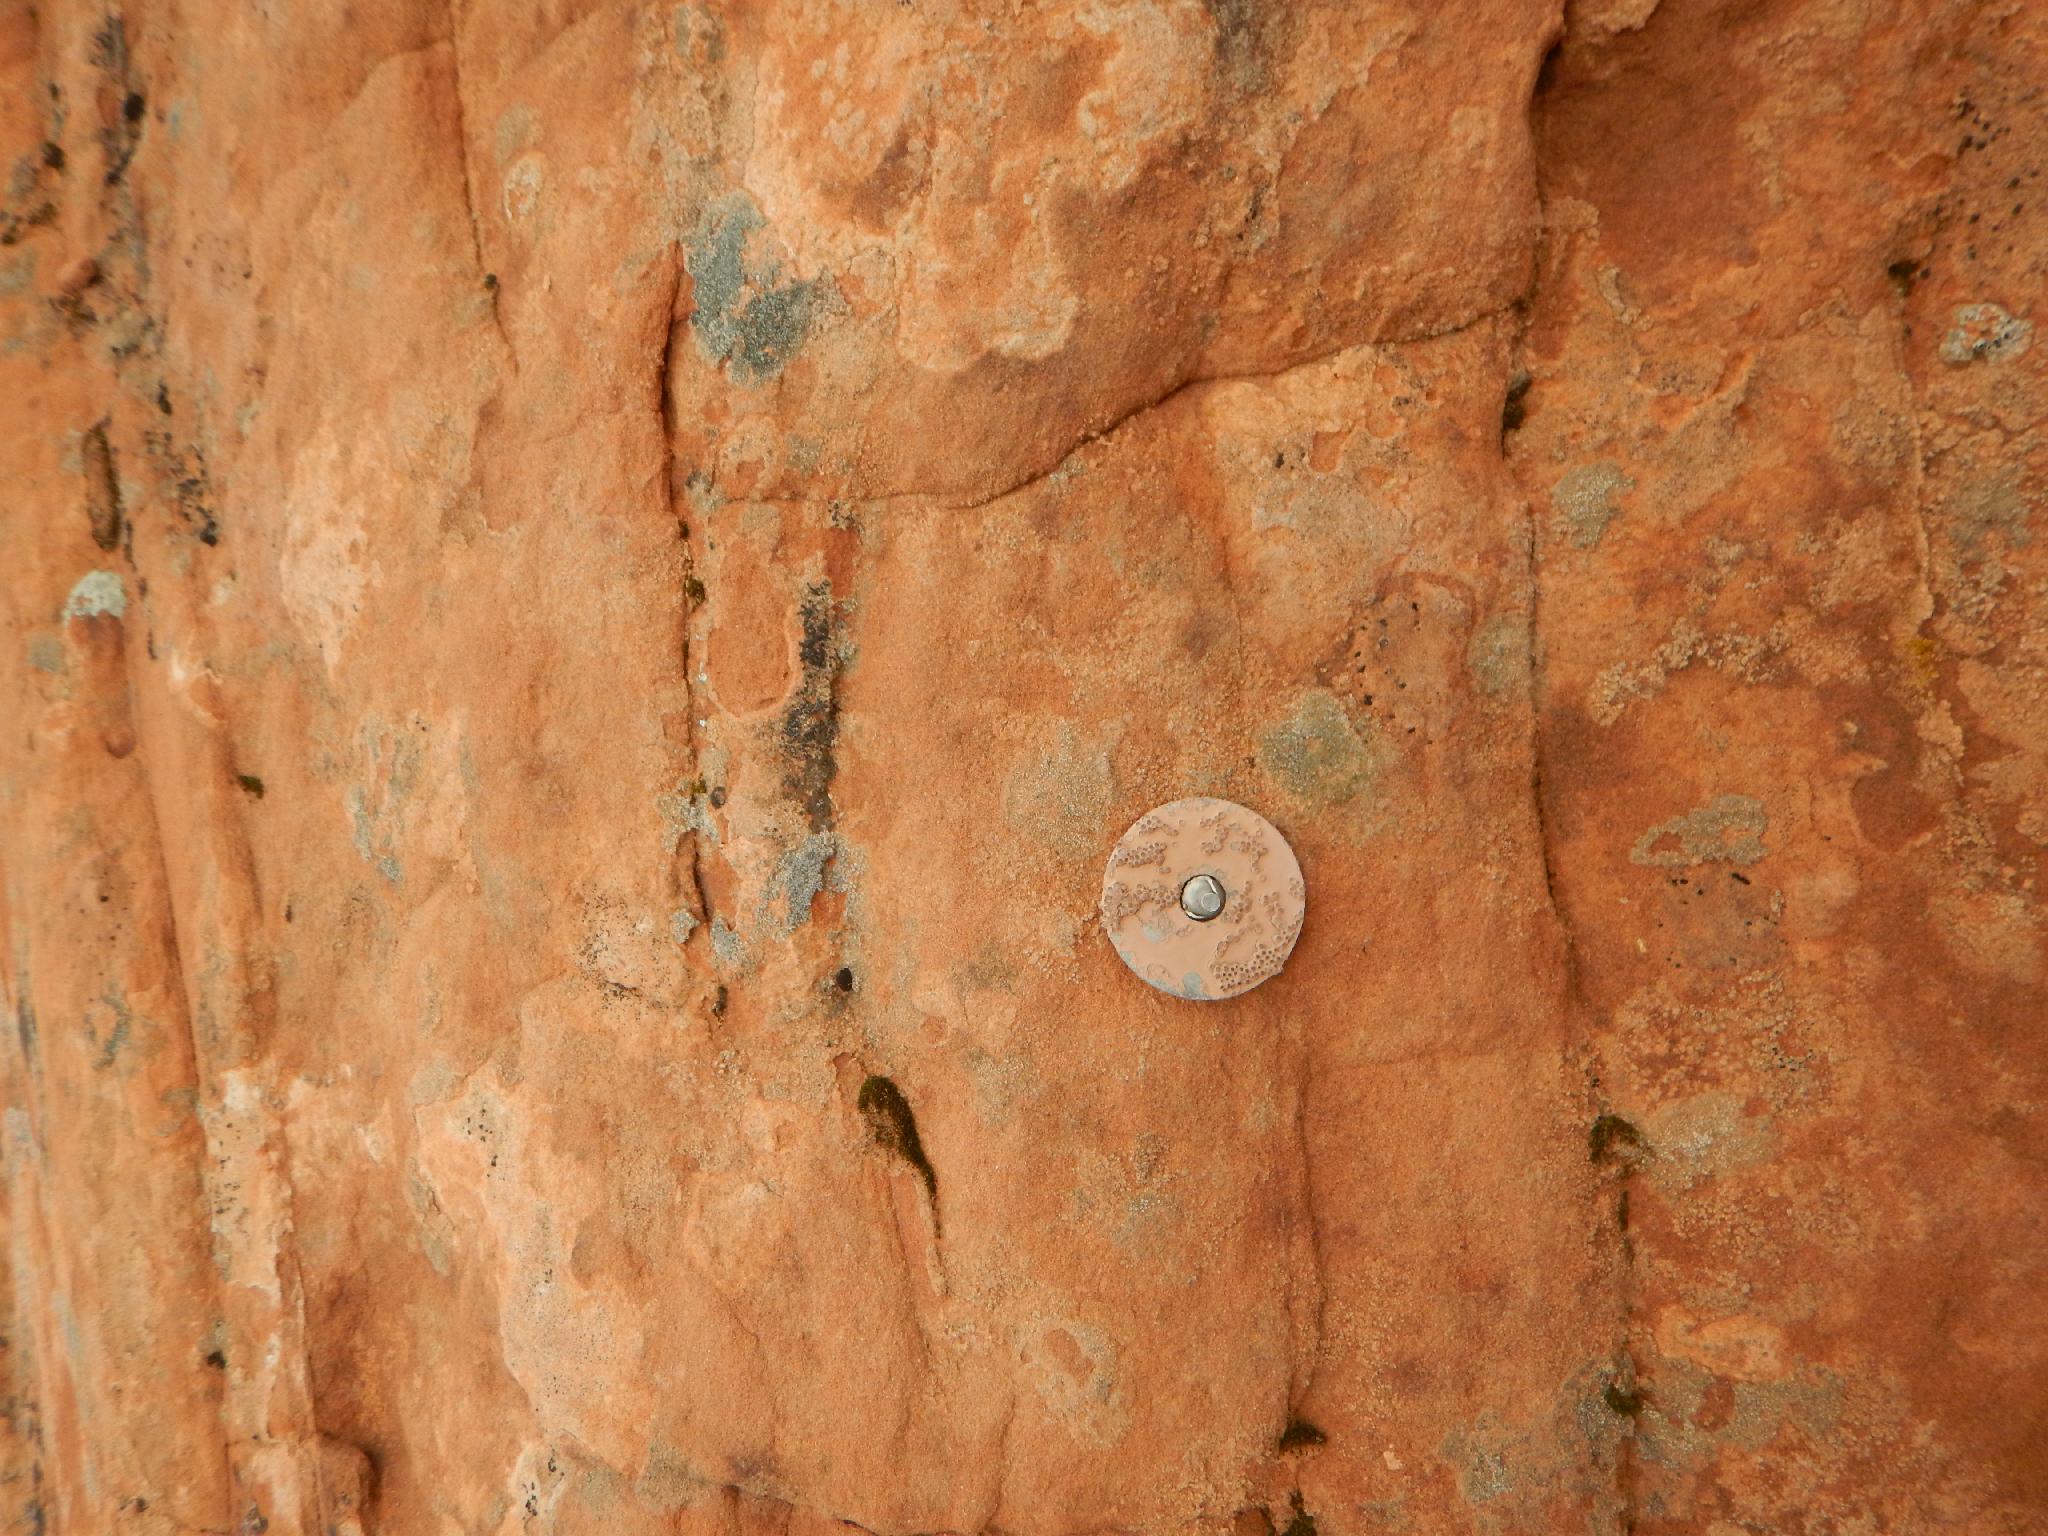
From the trailhead, follow the social trail a few minutes to the north point of Island In the Sky Mesa. The route starts up the north point just on the east side of the point. There is really only one likely looking spot and it shows a fair amount of wear. Follow the groove and use path up. A first mark is visible here, but also easy to miss. The route works up, then a bit to the west side reaching a narrow squeeze. A bolt before the squeeze will help re-assure you are on route.
After the squeeze, the route traverses a bit east, then up a slab section to a tree and anchor bolt. This is likely the first climbing crux and had a fixed rope on our visit. The anchor is more or less the end of the steep climbing as you have reached the shoulder of the mesa. Route finding to this point seemed pretty straightforward if you have a keen eye for use trails.
Part 2 - To the Summit
The route finding gets a little harder from here. Work mostly south, following a use trail and marks when you can find them. At a sandy area, go a bit west, then south to a nice view of a dryfall and pool.
From the pool, backtrack and find the mark that heads southeast. Keep a sharp eye, however, as just after a small downclimb, there is another mark directing you back to the southwest. Follow the path as the summit gets closer and closer. Many options here, but the goal is the reach the base of the sandstone summit. There is a large flat moki marble area here, as well as a rock that has been walled in for shelter. This is about the half way point.
Part 3 - To the Raps
Leaving the summit park was by far the biggest route finding crux for us! We checked out many routes and couldn't quite read the terrain confidently. Our route turned out to be easy, but took some time to find.
From the moki area, due south or slightly southeast of the summit is a drainage that drops steeply down slickrock to a glen area with a drainage coming in directly across from the other side. This slope looked hard, so we belayed the first down and it turned out to be lower 5th. Once down, you may notice a faded arrow pointing the direction south.
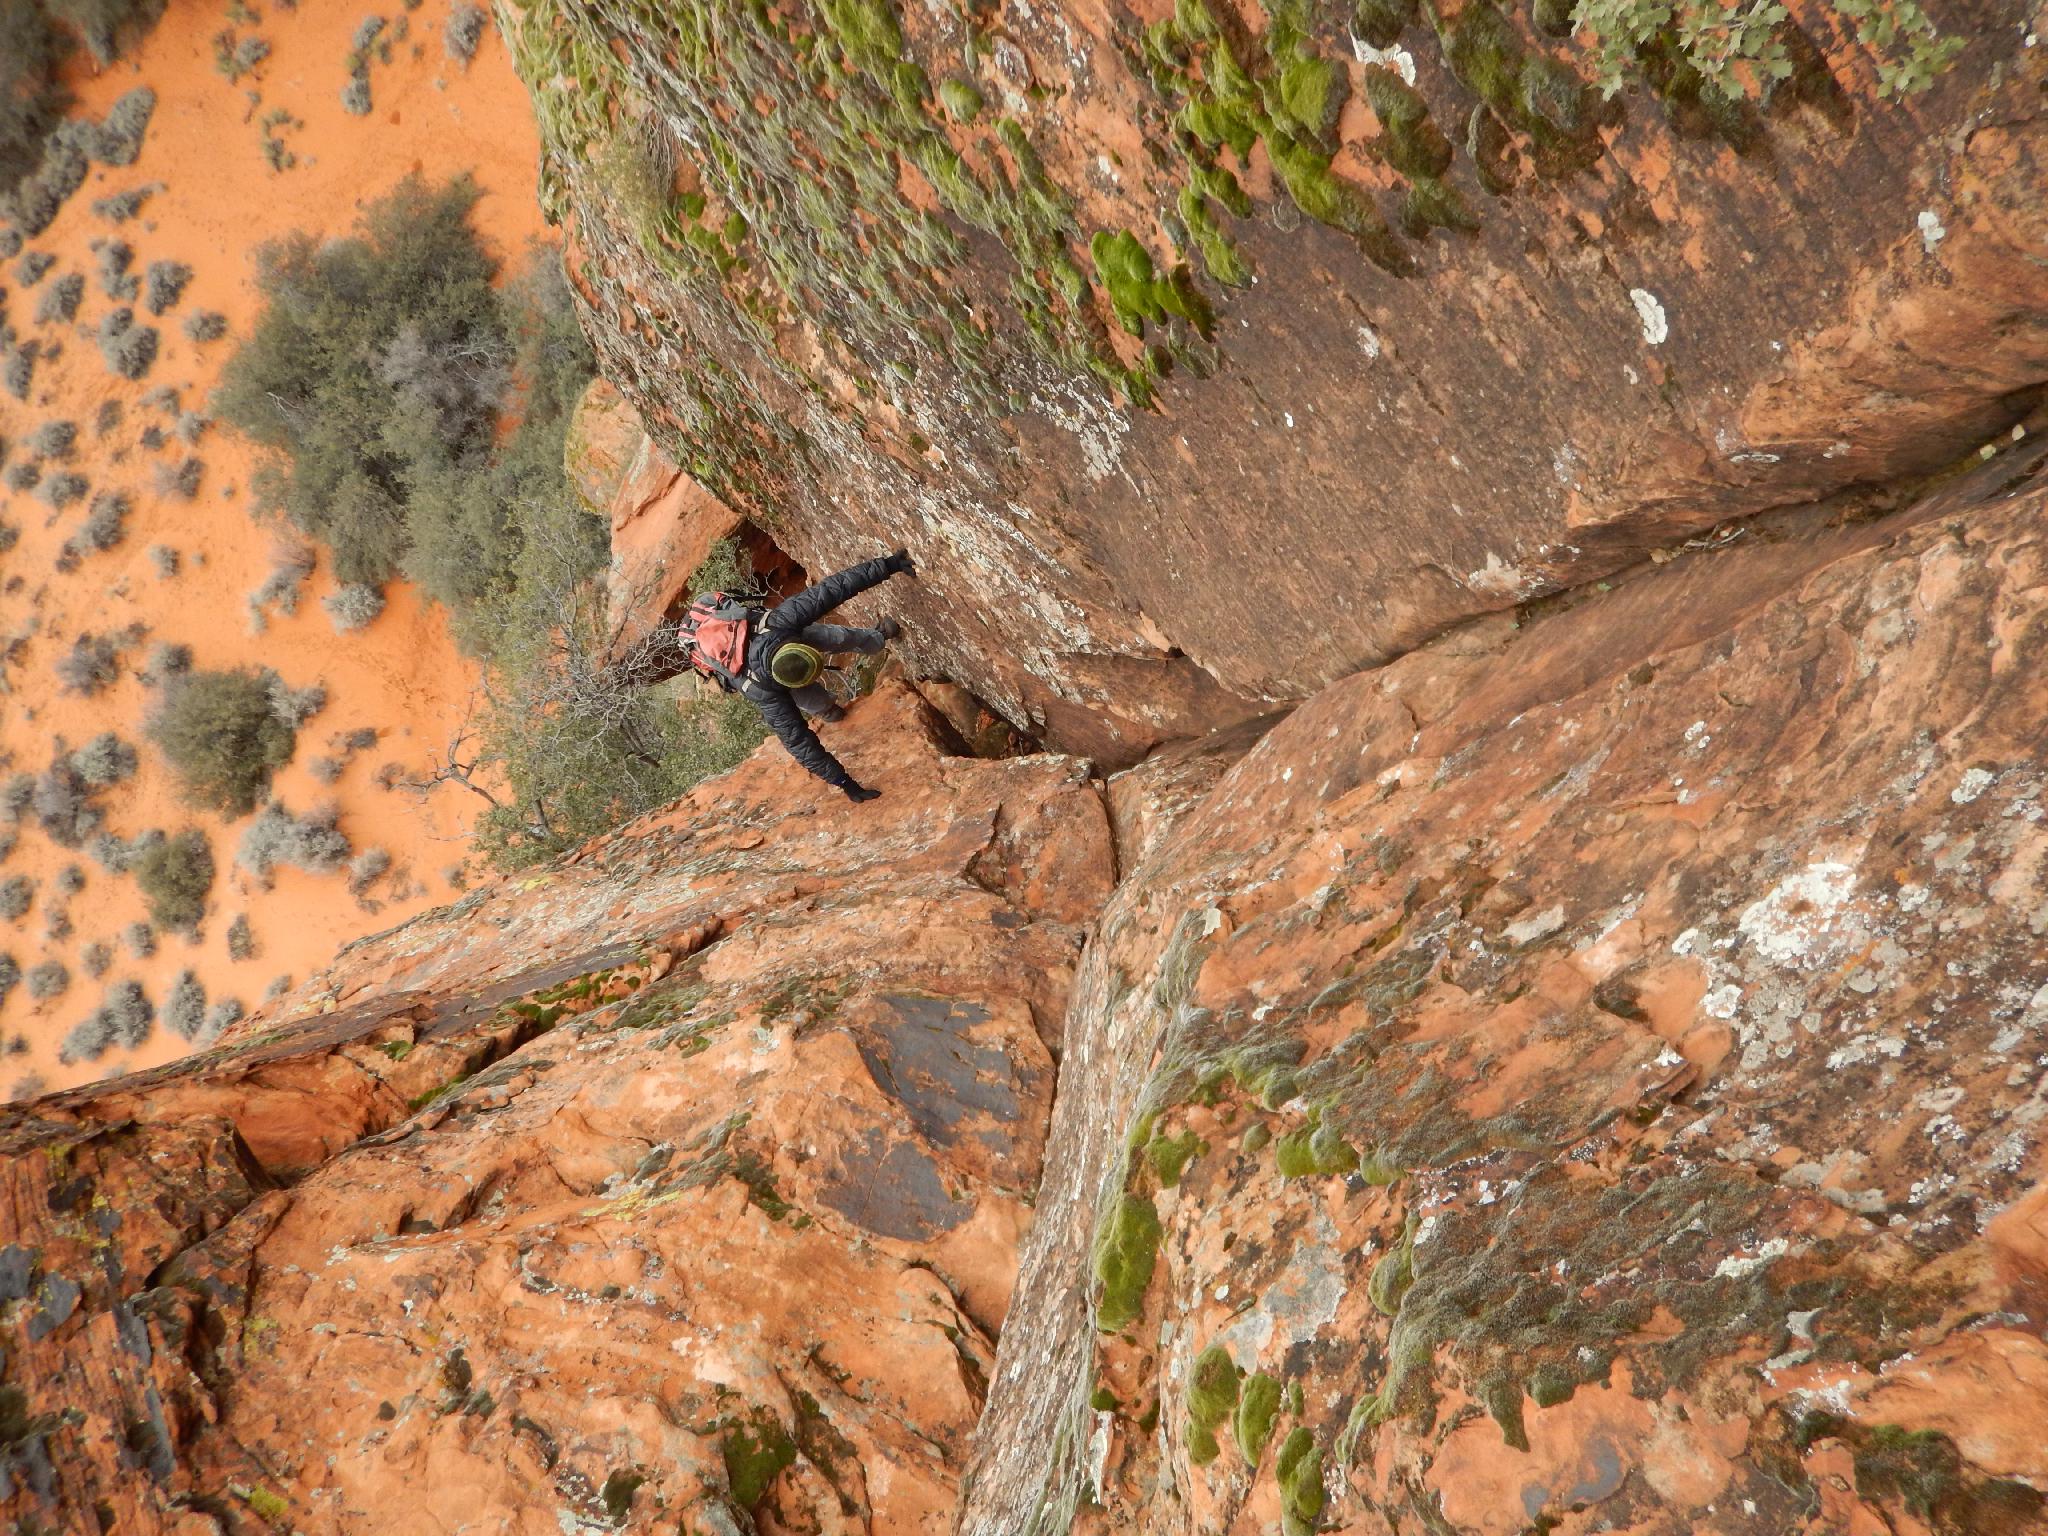
Route find south and southeast, looking for arrows and scratches in this section. The route comes to a chimney in a few minutes with a deep canyon on each side of it and a large gap below it This is the second climbing crux. If you can fit in the chimney, it isn't too exposed. If you’re too big, you'll be climbing the left arete, which is relatively easy, but very exposed.
At the top of the chimney, work west, around, and down to a large park area. Cross the park to the southeast side and go up a brush-filled canyon on the right. Follow it up to near its end where a marker denotes the climb out on the right (easy 5th class). From the climb out, keep working up and on the left side of the next slot, then down to a slickrock ledge and rap anchor.
Part 4 - Raps
The first rap was about 25 m ( 83 ft. ) followed by a downclimb to the flat sandy area. On the right of the flat area is another anchor for a short 10 m ( 33 ft. ) rappel. Once down, continue scrambling down to the flat level.
Once on the flat level, traverse north on a social/climbers trail. Continue on it until a huge boulder above a gully marks the descent spot. Downclimb the gully with a carved step or two at the top. Once down the gully, it is a few minute walk west to the park road and parking area.
Photos
Maps

12S 265383E 4120275N
37°11'58"N 113°38'37"W
12S 265440E 4120169N
37°11'55"N 113°38'34"W
12S 265428E 4120134N
37°11'54"N 113°38'35"W
12S 265418E 4120122N
37°11'53"N 113°38'35"W
12S 265420E 4120106N
37°11'53"N 113°38'35"W
12S 265411E 4120094N
37°11'52"N 113°38'35"W
12S 265411E 4120073N
37°11'52"N 113°38'35"W
12S 265416E 4120052N
37°11'51"N 113°38'35"W
12S 265423E 4120008N
37°11'50"N 113°38'35"W
12S 265420E 4119951N
37°11'48"N 113°38'35"W
12S 265406E 4119914N
37°11'46"N 113°38'35"W
12S 265391E 4119887N
37°11'46"N 113°38'36"W
12S 265405E 4119787N
37°11'42"N 113°38'35"W
12S 265412E 4119717N
37°11'40"N 113°38'35"W
12S 265443E 4119742N
37°11'41"N 113°38'34"W
12S 265450E 4119506N
37°11'33"N 113°38'33"W
12S 265473E 4119665N
37°11'38"N 113°38'32"W
12S 265438E 4119557N
37°11'35"N 113°38'34"W
12S 265475E 4119423N
37°11'31"N 113°38'32"W
12S 265469E 4119254N
37°11'25"N 113°38'32"W
12S 265464E 4119216N
37°11'24"N 113°38'32"W
12S 265347E 4119396N
37°11'30"N 113°38'37"W